


0.环境说明:
①操作系统:truenas
②ROOT 权限
③vDocker version 20.10.12, build e91ed57
Penpot是一款类似于Figma的原型图设计工具,是一款免费开源的软件,并支持本地化部署
1.安装docker-compose:
su -
wget https://github.com/docker/compose/releases/download/v2.5.0/docker-compose-linux-x86_64
mv docker-compose-linux-x86_64 docker-compose
mv docker-compose /bin
chmod +x docker-compose
docker-compose --version #显示docker版本
2.配置yaml文件:
wget https://raw.githubusercontent.com/penpot/penpot/main/docker/images/docker-compose.yamlvidocker-compose.yaml
根据需要修改yaml文件:
- PENPOT_PUBLIC_URI= #填入外部访问的域名地址
修改前端访问端口:
  penpot-frontend:
    image: "penpotapp/frontend:latest"
    restart: always
    ports:
      - 8000:80 #修改8000为你想要的端口

    volumes:
      - penpot_assets:/opt/data/assets

    depends_on:
      - penpot-backend
      - penpot-exporter

    networks:
      - penpot

    labels:
      - "traefik.enable=true"
修改postgres端口:
  penpot-postgres:
    image: "postgres:15"
    restart: always
    stop_signal: SIGINT
    ports:
      - 8000:5432  #修改8000为宿主机可用端口
    volumes:
      - penpot_postgres_v15:/var/lib/postgresql/data
修改注册信息:
- PENPOT_FLAGS=enable-registration enable-login-with-password disable-email-verification enable-smtp enable-prepl-server
修改注册邮箱:
      - PENPOT_SMTP_DEFAULT_FROM=service@wolfmark.org #你的邮箱
      - PENPOT_SMTP_DEFAULT_REPLY_TO=service@wolfmark.org #你的邮箱
      - PENPOT_SMTP_HOST= mail.wolfmark.org #邮箱服务器地址
      - PENPOT_SMTP_PORT=  #此处填写smtp端口
      - PENPOT_SMTP_USERNAME=service@wolfmark.org #你的邮箱
      - PENPOT_SMTP_PASSWORD= #smtp验证
      - PENPOT_SMTP_TLS=false
      - PENPOT_SMTP_SSL=false
3.拉取镜像:
docker-compose -p penpot -f docker-compose.yaml up -d #启动
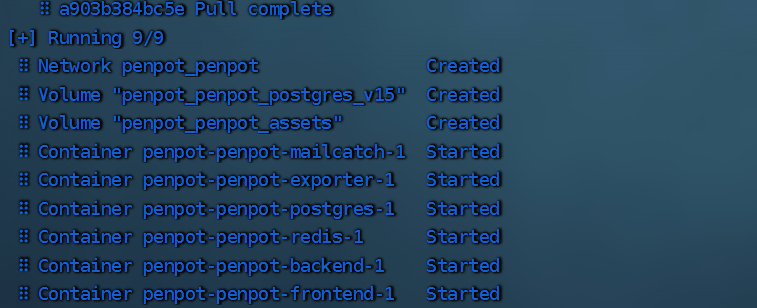
最后访问前端页面,安装完成
docker-compose -p penpot -f docker-compose.yaml down #关闭 docker镜像
近期评论