0.环境说明:
①Debian12
②RAM 2G SSD20G
③ROOT 权限
④域名指向(代理域名指向服务器IP地址)
⑤1Panel面板社区版v1.10.34-lts
(已安装OpenResty,即nginx管理器)
⑥Docker环境
注:使用1panel主要是方便,省去了很多部署工作,这几年用了多款面板,包括BT等,目前还是1PANEL更好用一点。
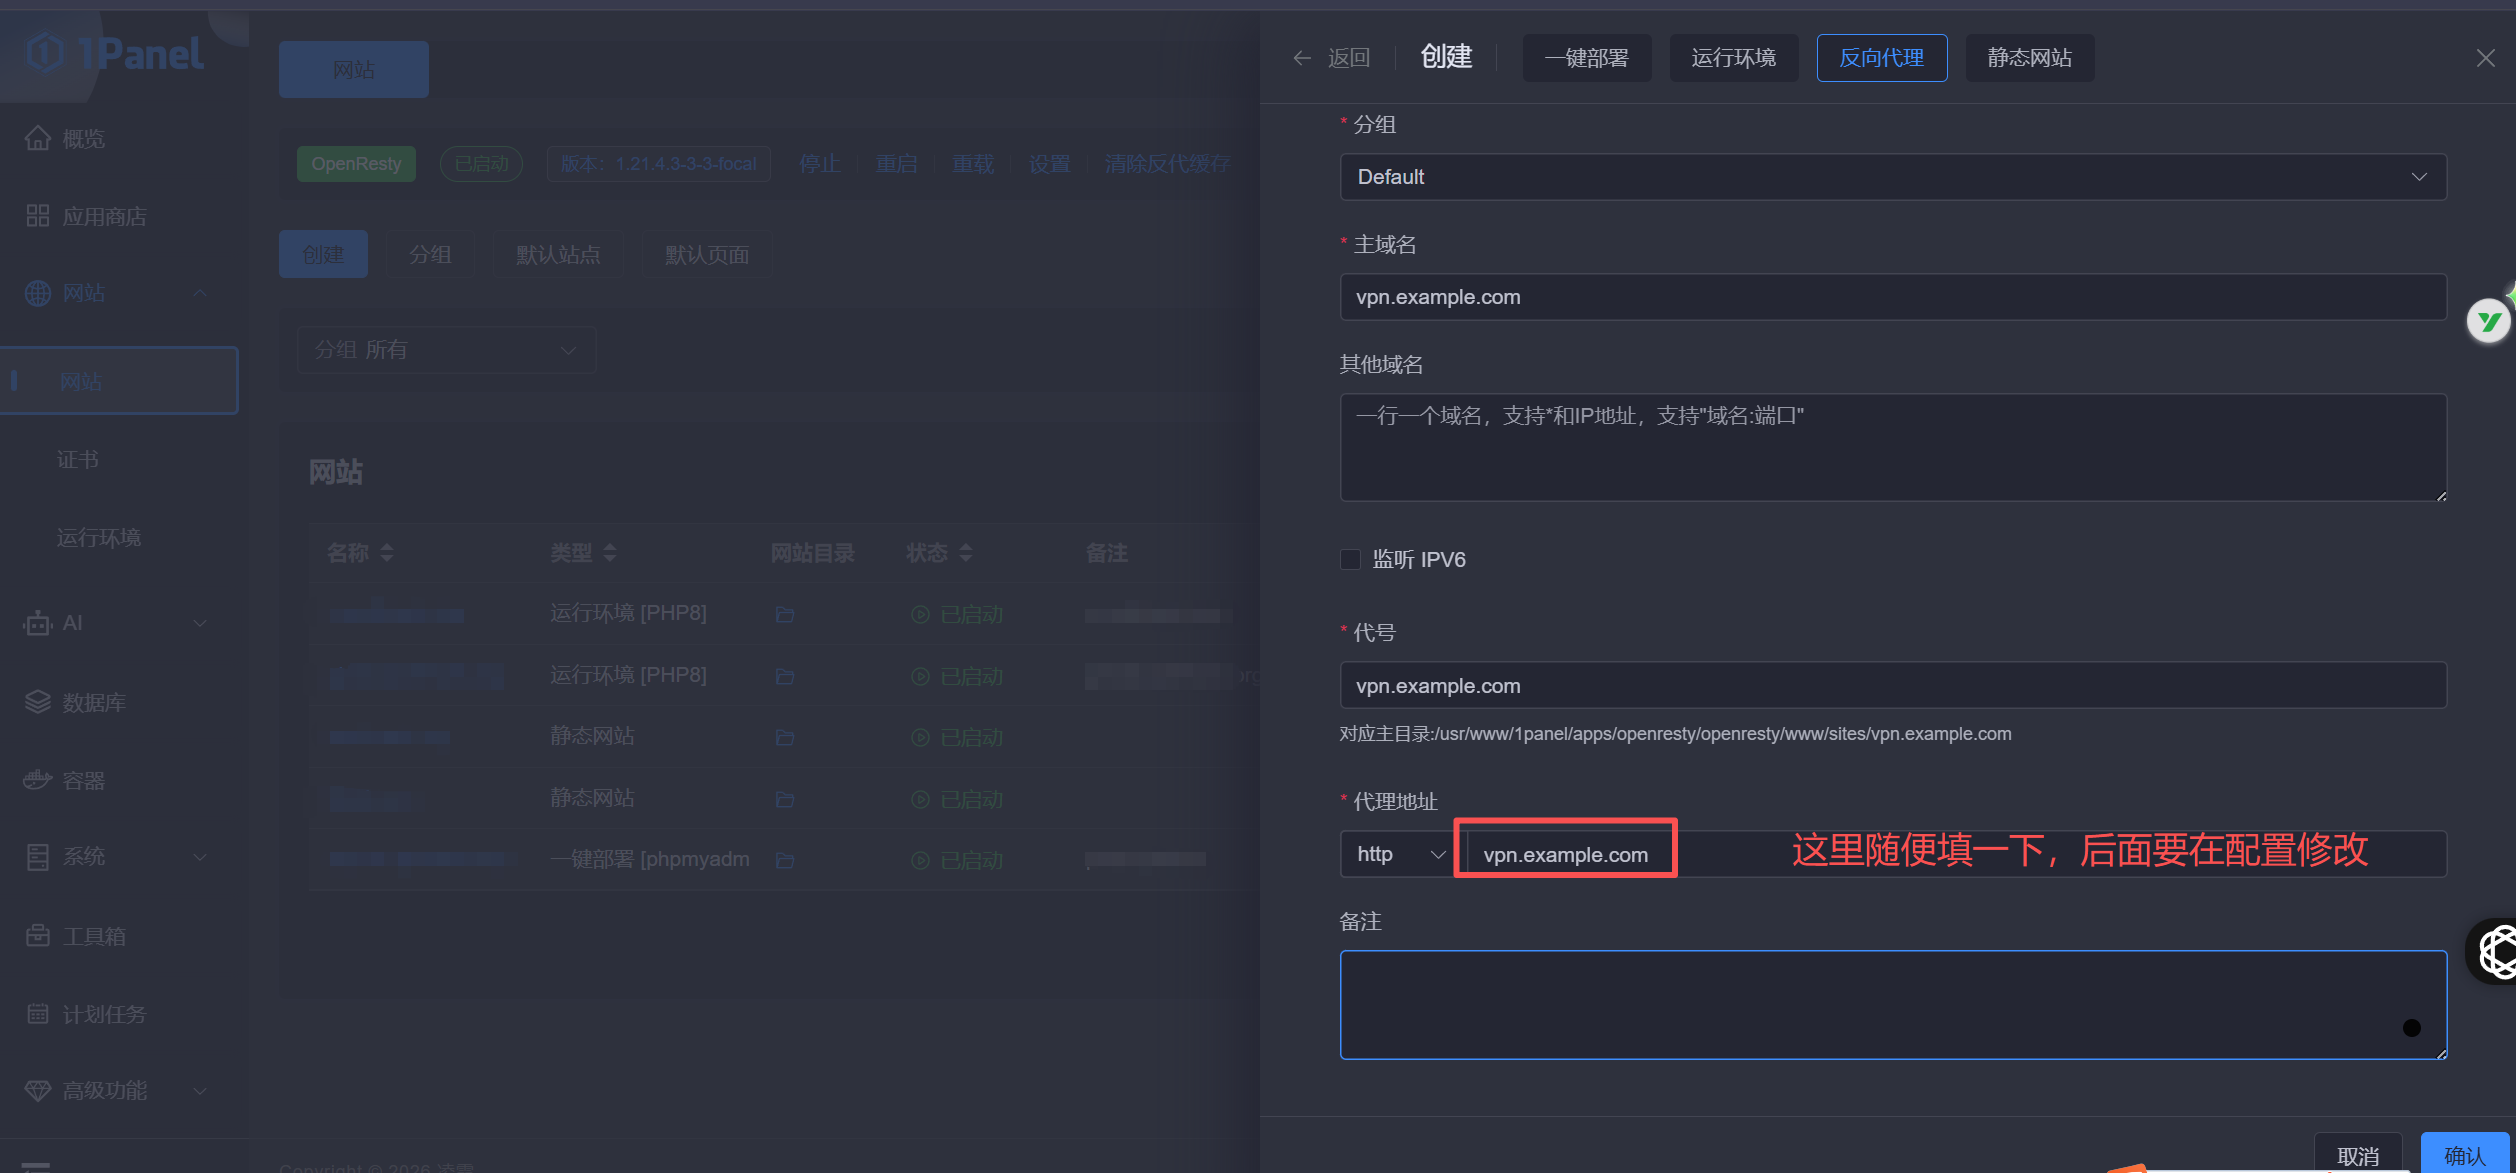
1.部署站点 :
①假设站点地址为vpn.example.com(如0.④)
在1panel创建NGINX站点:

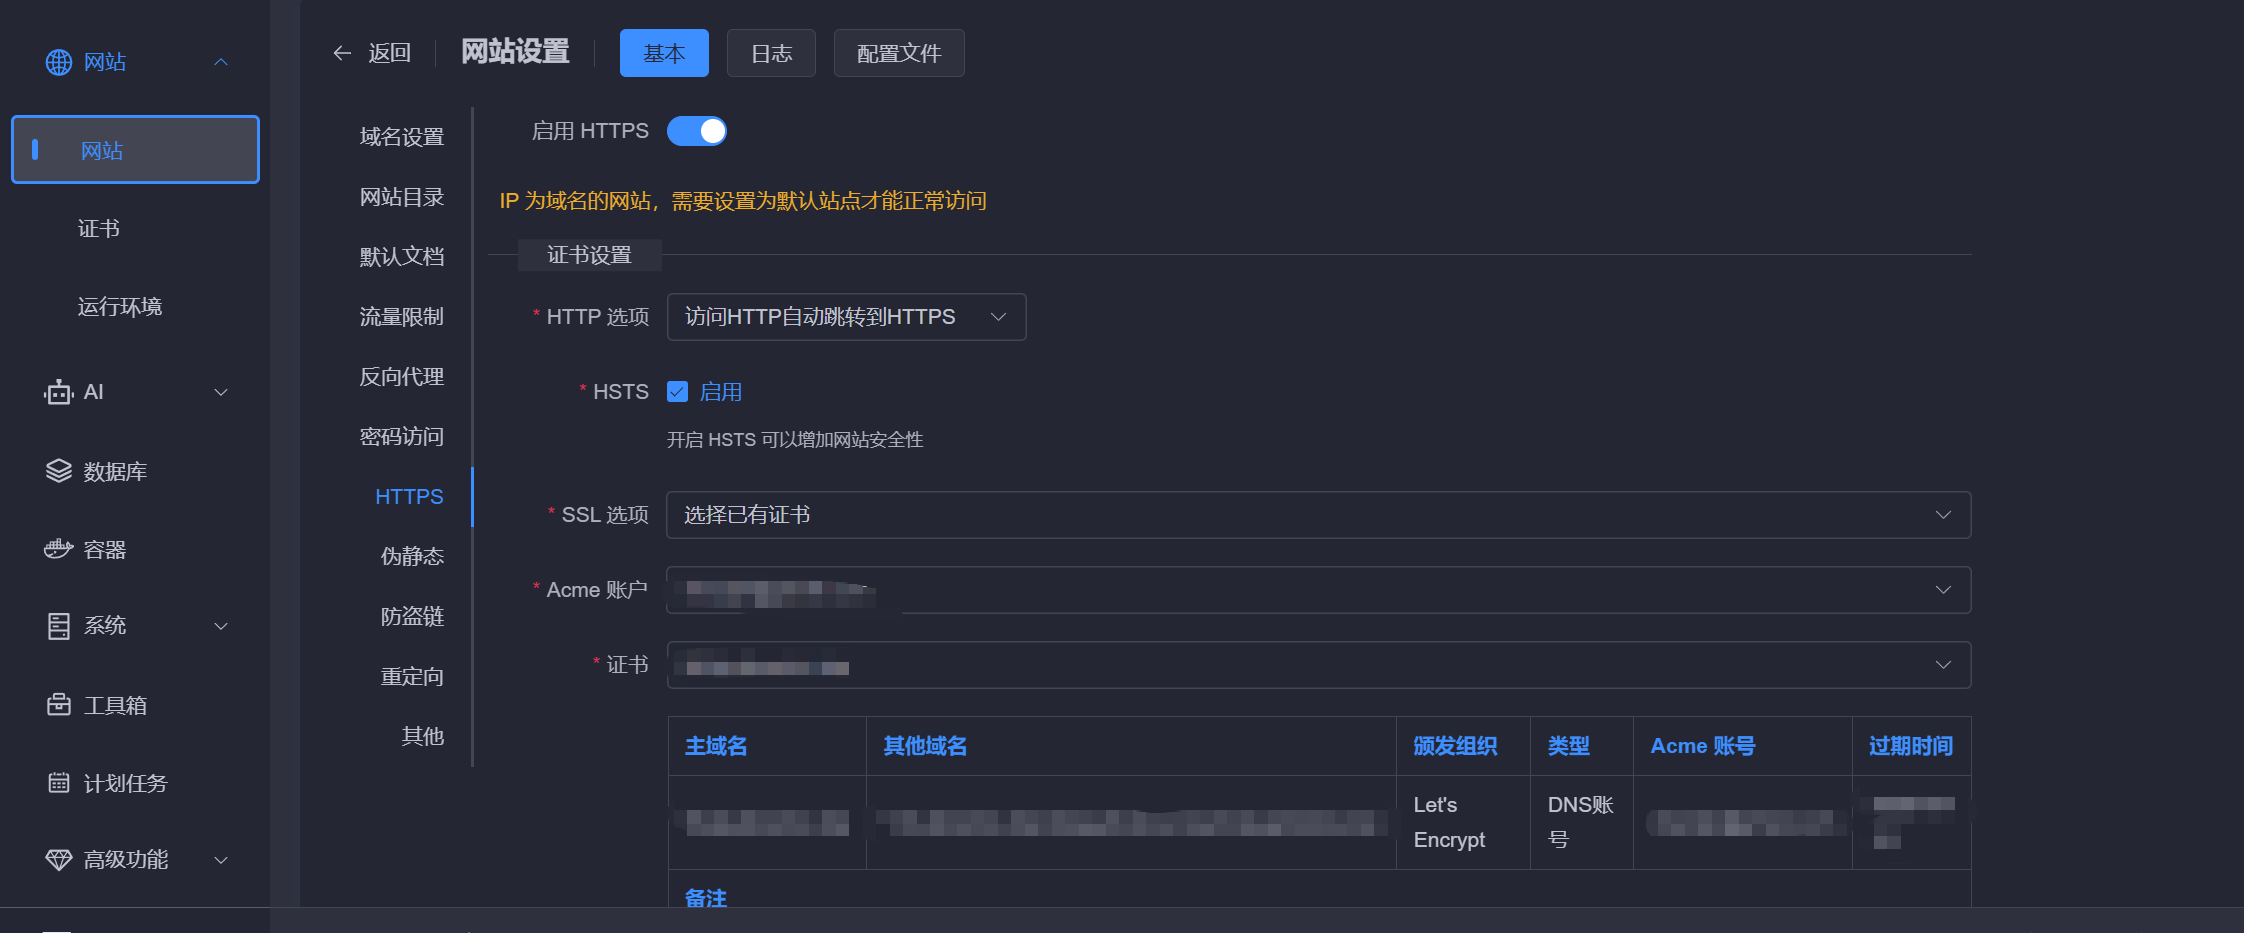
②注册SSL
在1panel证书里面选择①创建的网站,并选择对应的DNS和ACME账户
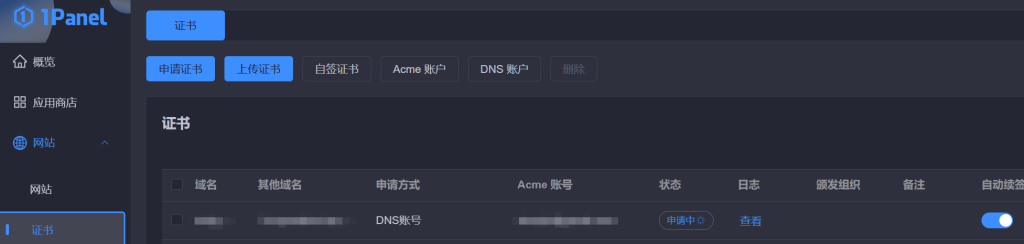
这个让它去申请,去完成接下去的步骤
当“申请中”变成正常时,则SSL证书可用
2.NGINX反代配置 :
进入vpn.example.com反向代理目录,
修改……/proxy/文件:
location / {
	proxy_pass https://vpn.example.com/;
	proxy_redirect off;
	proxy_ssl_server_name on;
	sub_filter_once off;
	sub_filter "vpn.example.com" $server_name;
	proxy_set_header Host "vpn.example.com";
	proxy_set_header Referer $http_referer;
	proxy_set_header X-Real-IP $remote_addr;
	proxy_set_header User-Agent $http_user_agent;
	proxy_set_header X-Forwarded-For $proxy_add_x_forwarded_for;
	proxy_set_header X-Forwarded-Proto https;
	proxy_set_header Accept-Encoding "";
	proxy_set_header Accept-Language "zh-CN";
}

# 分流反向代理
location /v2ray{
	proxy_redirect off;
	proxy_pass http://127.0.0.1:10086;  # 本地入站端口
	proxy_http_version 1.1;
	proxy_set_header Upgrade $http_upgrade;
	proxy_set_header Connection "upgrade";
	proxy_set_header Host $host;
	proxy_set_header X-Real-IP $remote_addr;
	proxy_set_header X-Forwarded-For $proxy_add_x_forwarded_for;
}
3.安装V2ray(Docker版):
①创建 …/1panel/apps/v2ry 路径
②并在此目录下创建docker-compose.yml文件,并写入以下内容:
version: '3.0'

services:
  v2ray:
    image: v2fly/v2fly-core:latest
    container_name: v2ray
    command: ["run", "-config", "/etc/v2ray/config.json"]
    restart: always
    volumes:
      - ./config.json:/etc/v2ray/config.json
    ports:
      - 127.0.0.1:10086:10086 #2中反代配置端口
    networks:
      - 1panel-network

networks:
    1panel-network:
        external: true
③在终端输入:
cat /proc/sys/kernel/random/uuid
获取到UUID
④同时在当前目录创建config.json文件:
{
  "log": {
    "loglevel": "info",
    "access": "/var/log/v2ray/access.log",
    "error": "/var/log/v2ray/error.log"
  },
  "inbounds": [
    {
      "port": 10086,
      "protocol": "vmess",
      "settings": {
        "clients": [
          {
            "id": "",#③获取到的ID
            "level": 0,
            "alterId": 0
          }
        ]
      },
      "streamSettings": {
        "network": "ws",
        "wsSettings": {
          "path": "/v2ray"
        }
      }
    }
  ],
  "outbounds": [
    {
      "protocol": "freedom",
      "settings": {}
    }
  ]
}
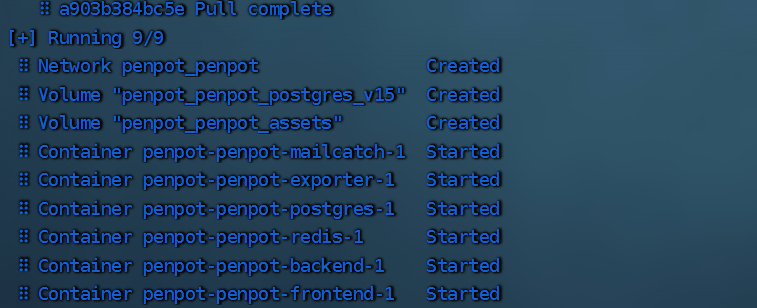
⑤终端进入v2ry目录
启动docker镜像
docker-compose up -d
6.为伪装站点绑定证书 :
选择1中创建的站点,绑定证书

7.开启防火墙
在1panel面板→系统→防火墙处添加规则,添加:80、443、其它你的代理端口
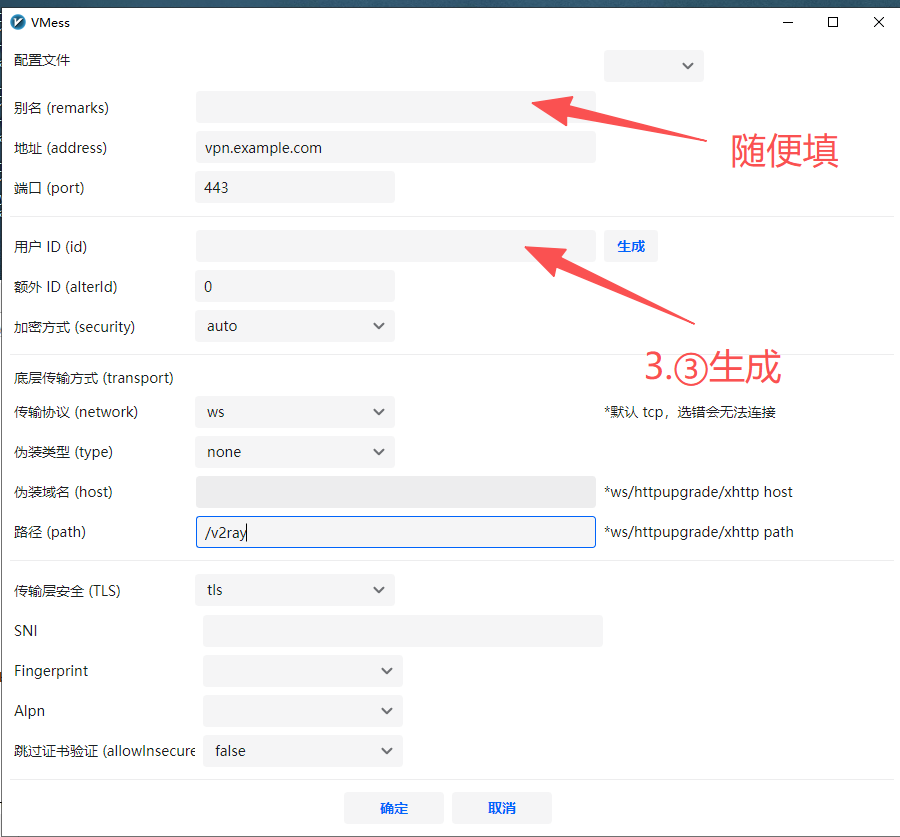
8.客户端配置:
①以V2RAY windows版为例:
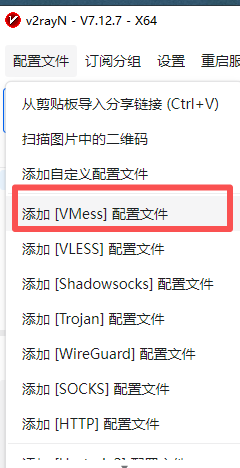
②输入具体配置信息
其它:


近期评论